Thursday, January 29, 2015

Behind the cover: A Good Food Day: Reboot Your Health With Food That Tastes Great

by Marco Canora, with Tammy Walker; photographs by Michael Harlan Turkell

An honest no bullshit approach to eating healthier without compromise.

I was recently introduced to a neat program called Blogging for Books by a friend and wonderful blogger Erica Kennedy of Everyday Erica. In short the program gets books into the hands of bloggers. I know you probably hadn't deducted to that but I thought I would explain. Needless to say I would highly recommend checking out her blog for all things creative, healthy and fun.


A Good Food Day

I chose this book because I liked the title. A good food day, don't we all seek that? Too often we skip breakfast, grab a fast lunch or maybe even say to hell with dinner. I know this is often the case for me. I never eat breakfast, usually have an unhealthy lunch or skip it entirely and dinner is where I focus my power. But face it you can't live a healthy life eating one decent meal a day.

Marco tells his story of being a career chef and treating his body poorly for years upon years. Between work and life, time gets away from you and at some point you realize you're killing yourself. With the help of his wife he created a concept called "A Good Food Day" which outlines various steps to successful eating. These steps coupled with his amazing recipes make eating healthy easy, fun and even a little adventurous. 


With 125 recipes and stunning photos from Michael Harlan Turkell this book not only tells a great story but also inspires you to try something new. Maybe a day with no-cook overnight oats in the morning, shaved asparagus, avocado and quinoa salad for lunch and lamb stew for dinner.

Since reading this book I have made some simple changes to my diet and noticed quite a difference. Simply substituting a cup of coffee for a shake it the morning has been very easy for me to do and allows me to get my body going and intake tons of nutrients. If you are looking to make simple changes to your diet and need a little help crafting a Good Food Day check out this book.


I even caught my 11 year old enjoying this book.
Disclaimer: I received this book from Blogging for Books for this review.

Tuesday, January 13, 2015

2015 Cupid's Undie Run Fundraiser

Will you give me $20 if I take off my pants?

Will you donate to my Cupid's Undie Run fundraising efforts?

Donate here: http://my.cupids.org/BadRock 

A bit more on what I'm doing...

So I signed up for this event called Cupid's Undie Run. Yeah, it's just like it sounds. I'll be running around... in public... in my undies... in the middle of February... in DENVER!
No, I didn't lose a bet. Why do you ask?

I'm doing this because 1 in 3,000 children are born with a genetic disorder called neurofibromatosis (NF). It causes tumors to grow non-stop on the nervous system, often causing deafness, blindness, disabilities and debilitating pain. You know what's even worse? There is no cure and frighteningly few treatment options.

...so I'm on a mission to get some 'exposure' for NF research, if you catch my drift. I'll do whatever it takes, even if that means stripping to my skivvies and risking hypothermia and/or never running for office!

Last year we raised over $2.8 Million in donations that went towards the Children's Tumor Foundation and NF research, but there's still a funding gap that needs to be addressed. With your help, we can help bring new treatments to light for the 2 million worldwide battling NF.

Whether it be $5, $50 or $5,000... all donations help and go a long way toward helping those in need. Oh yeah, and they're tax-deductible, too.

Here's the link one last time: http://my.cupids.org/BadRockIf you want in on this effort join our team and run with us in your undies! 


Donations to Cupid's Undie Run benefit The Children's Tumor Foundation. 
The Children's Tumor Foundation is a 501(c)(3) non-profit organization with a 4-Star Charity Navigator rating. CTF prides itself on efficiency, spending 82.4% of its revenue on program expenses and less than 8% on administrative costs. 


Monday, August 18, 2014

Adam's ALS Challenge


I’m going to jump up on a soapbox, so bear with me for a minute.


The ICE BUCKET CHALLENGE is broken! I say this as I was recently “called out” by one of my best friends. He made a great video (thanks to Ma’) that shows him calling me and some others out, giving us 24 hours to take the challenge then dumping the bucket of water on his head.

I have seen this explode on social media but I have been curious, is this really helping ALS? I mean the whole point of the challenge is to dump water on your head to avoid having to donate or having to donate far less.


"Between July 29 and today, August 12, The ALS Association and its 38 chapters have received an astonishing $4 million in donations compared to $1.12 million during the same time period last year." -- That seems like a lot, but for as much publicity as it's been given it's really not.

So I say this challenge is broken! It’s broken because we're spotlighting ourselves. Why not spotlight ALS, why not understand how devastating this disease really is. Why not challenge each other to do something that really makes an impact on ALS?

I challenge you all to watch the video below. To take a quick look at this young man’s journey and understand that this horrific illness claimed the life of this man in just a few short years. Then think like me and understand that where there’s a good beer there are great people. Checkout Ales for ALS, click on Donate Here in the upper right hand corner and put your money where your ICE BUCKET is. Even a donation of a buck or two can make a difference. Then find a participating brewery and enjoy a pint with a friend.


I really do enjoy seeing everyone playing in the water, but I really hope you all will take my challenge and understand how ALS touches the lives of others and how a cold craft beer can help with a cure.


Wednesday, March 6, 2013

Trying my hand at Pasta di Cacao

From time to time I run across things on Pinterest and think to myself, is this for real!? This recipe was one of those.


So I was puruzing (is that even a real word?) Pinterest like I like to do, and I ran across a picture of this beautiful dark brown pasta. I clicked on it, and it got bigger, why this is necessary I don't know. Again I clicked on it and it led me to Cathi Iannone's blog The Brooklyn Ragazza. The post was called Award-Winning, Chocolate Pasta ~ Pasta di Cacao and I was awed by the beautiful pictures that were upon my screen. I began reading and quickly realized this wasn't some bogus post this was some legit pasta that I had to try. So I did!

Rather than post her recipe I would encourage you to follow the links above and visit her blog, she has tons of other beautiful posts that I intend to try sooner or later.

I will note that I strayed from her recipe a little and used standard King Arthur AP Flour. They make a King Arthur Flour Italian-Style Flour, 3 lbs. (Google Affiliate Ad) that is more like a "00" like she calls for in the recipe but I couldn't find it local.

I also used Ghirardelli unsweetened cocoa because it was the best I could find at the supermarket. I would guess you could find better and it would make this awesome pasta even awesomer.

I followed the recipe and I'll let the cell phone photos speak from here....


I combined all the ingredients in the Kitchenaid until the dough would barely stick together. It will seem very dry but that is perfect. I then made a ball and covered in plastic wrap for a 30-45 minute rest.

Then onto the rollers. Like all pasta, start out on the widest setting and work your way down with every pass. I worked mine down from 0 to 5 on the Kitchenaid roller.


Then onto the fettuccine cutter....


While all of that was going on I tossed a couple of seasoned chicken breasts on the BBQ and started my Alfredo Sauce.

The Alfredo Recipe I use is quite simple and easy to make but it takes time and patience.

Ingredients

  • ½ Cup Heavy Cream
  • ½ Cup Milk
  • 6 Tablespoons Butter (yeah the real stuff, don't even try to cheat)
  • Salt and Pepper to taste
Add all to medium saucepan and slowly bring to a boil over medium heat, lower the temperature to a simmer and continue to stir occasionally making sure not to burn the bottom. Simmer until the sauce begins to thicken ~20 minutes. Serve immediately to avoid separation.

Boil your noodles, prepare your cooked chicken, add sauce and enjoy!


In closing this was some of the most incredible pasta I have made to date. Like Cathi says, this is a savory pasta. So it plays with your mind a little, naturally you think of chocolate as being sweet yet this is not. 

While making this your home will be engulfed with the amazing smell of cocoa. And by the time it's ready you'll be starving. My wife was just sure she was going to dislike it yet she loved it and has encouraged me to make it again soon.

Sunday, February 17, 2013

Bacon Wrapped Jalapeno Poppers


These spicy bites can be tailored in a number of ways, this is one of the simpler ones. Add ground meat to the mix to add another dynamic or peanut butter if you're feeling nutty.


Ingredients

  • 8 Extra Large jalapeƱo peppers or up to 15 smaller ones
  • 1 package softened cream cheese
  • 1 cup mild cheddar cheese
  • 1 lb sliced bacon
  • 1 craft beer*


Preparation Instructions

  1. Slice the top off each pepper, slice in half, then remove the ribs and seeds.
  2. Blend the cheddar and cream cheese together with clean hands. Season as desired, not required.
  3. Stuff a good amount of the cream cheese mixture inside each pepper half.
  4. If using smaller peppers take the bacon and cut the strips into 2 pieces (cut the short way, not the long way). If using large peppers you can use a whole slice.
  5. Wrap a bacon piece around each pepper, secure it with a toothpick if necessary. I usually don't.
  6. Cook using one of the following methods.


Grill:

  1. Prepare your grill for indirect grilling at around 375˚F.
  2. Place the peppers on the top of a broiler pan (set aside the bottom) or mesh pan.
  3. Place the broiler pan on the grill grates.
  4. Grill for 25-30 minutes or until the bacon is sorta crispy.
  5. Remove from grill and serve hot.


Bake:

  1. Place a wire rack in a rimmed baking sheet and place the poppers on the wrack.
  2. Bake at 375˚F for about 25-30 minutes or until the bacon is sorta crispy.
  3.  Remove from oven and serve hot.


*unnecessary but it sure makes assembly more enjoyable.


Monday, January 28, 2013


I'm going to Kindergarten, my teacher said so.


My son's teacher has convinced him that he needs to sign up for kindergarten next year. Only problem, he's only 3! But he's got it all figured out at least he thinks.

Friday, January 25, 2013

I found a cure for the cold weather blues.

Traeger makes a really nice insulation blanket for their pellet grills, but they cost $144 more than this.


So Traeger pellet grills are really an amazing tool for turning damn near anything into an amazing meal. They run on hardwood pellets that are fed into the firebox to maintain a user setpoint (in degrees) or when dialed to the smoke setting they do just that.


This is my Traeger BBQ075 Texas Grill
"Designed after the traditional Texas Style wood cookers, the Texas brings old fashioned wood cooking into the 21st century by featuring a high-tech auger-fed burner, electronic autostart ignition, multi-position digital thermostat control, and EZ-drain grease system."

This thing is great but when the weather gets cold you find your grill burning extra fuel to overcome the cold ambient temperatures. There are a few ways to help combat this, one is to increase the thermal mass by adding firebricks or sand. The second is to insulate the barrel to try and keep the heat from escaping in the first place.

Traeger offers a solution but there are a couple flaws to their method  First, it doesn't play well with the front folding shelf. Second, it does not cover the bottom of the barrel. Third, it's down right expensive. The proper blanket for my machine is $179.

So I took matters into my own hands, did some reading and research from reputable sources like pelletheads.com and then began thinking of ways to combat the cold. 

What I came up with was an understanding that the barrel of my Texas grill is just over 6 feet in diameter. Tillman makes welding blankets that are 3' X 3' and are resistant to temperatures up to 1800°F. They are also Non-flammable, non-melting, non-shrinking, scratch free.

The best price I found on these was a CyberWeld for $22.95 X 2 + FREE S/H = $45.90.


Next I thought about what the best way to secure these blankets to the barrel of the machine. I thought about sewing nylon straps to them and using clips like Traeger does but talked myself out of it because sewing thick materials suck and they look like they interfere with the lid closing. So what I came up with was rare earth magnets. 


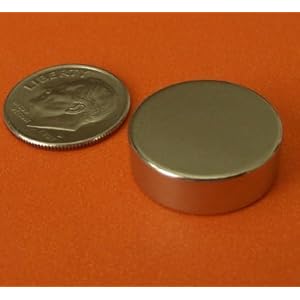
I searched around and found 10-pc Strong Rare Earth Disc Magnets 3/4" x 1/4" Neodymium on Amazon for $9.29 + $1.75 S/H = $11.04.

I received both packages within 3-4 days and put everything together. 


I placed the blankets on top and bottom and secured them with the magnets. Everything fit very nice and the magnets did a great job of sticking the blankets to the grill.

Bottom / under the folding shelf
Lid open


Here are a couple of angles via the camera phone, sorry about the haze. I'm too lazy to get out the big Nikon.

Backside
Scary magnet warning that came on the box - They are pretty powerful with 19lbs of pull force.

I then fired it up and gave it a test run. It heated very fast and maintained temp much better than before. I'll be curious to see how much it saves on a low and slow cook.

A nice smoky startup.


The internal temperature is quickly approaching 450°F, the surface of the blanket it under 120°F and you can hold your hand on it infinitely. 


The magnets on the other hand get rather hot, so be careful!

Non-scientific temperature measurement.


Not bad for a cold Colorado night ~19°F

So, hopefully it works out as well for you as it did for me. More importantly, saves you some $$$

Total build cost = $56.94